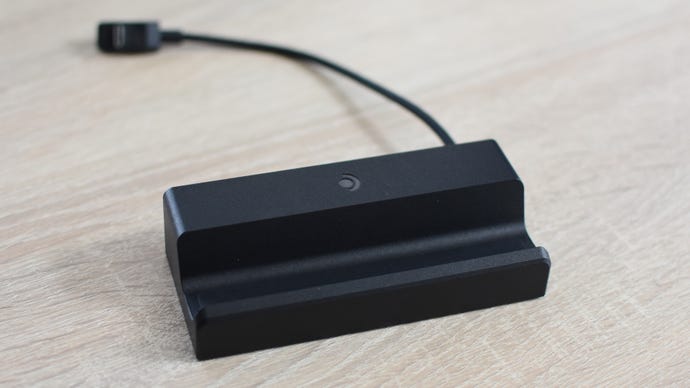
For a handheld PC, the Steam Deck benefits an awful lot from having a mouse and keyboard plugged into it, and nothing enables this marriage of portable and peripheral like one of the best Steam Deck docks. And it’s not just USB connectivity that gets a boost – external displays, rock-solid Ethernet connections for game downloads, and power delivery all make dock usage a preferable alternative to simply hooking up Bluetooth accessories. Along with a microSD card (and possibly a better case), these stand/hub combos are definitely among the tools that any regular Steam Deck wielder should have.
The most obvious application of a dock is to turn your Steam Deck into a desktop PC, with peripherals, a full-size monitor, and power supply making full use of all the added ports. But docks are, in my experience, extremely handy even if you’re sticking to handheld play. That’s because most of the Deck’s best (and best-hidden) capabilities can only be realised by delving into its Desktop Mode. Adding non-Steam launchers like Battle.net, or installing the plugin-rich Decky Loader, demand that you navigate this Windows-esque flavour of SteamOS, and that’s dramatically easier with a mouse and keyboard than with the Deck’s tiny trackpad and screen-filling digital keyboard. Once the fiddliness of installation is over, you can simply unplug the dock and enjoy the fruits of your Desktop Mode labour back in full handheld style.
For this kind of setting-up work, you could just use any USB-C hub, but a proper dock is better as it props up your Steam Deck for easy screen reading. They’re also much more likely support sufficient pass-through power delivery, so connecting the dock to mains power will keep your Deck charged up – rather than having it suffer the strain of the hub and connected peripherals on its already modest battery life.
That’s just one of the considerations I gave to these picks of the best, along with build quality, stability, and the diversity of their physical connections. Even if it’s just for a short while, a dock can be your Steam Deck’s home. Might as well make it comfortable.
Best Steam Deck docks
Valve Steam Deck Docking Station
The best Steam Deck dock overall

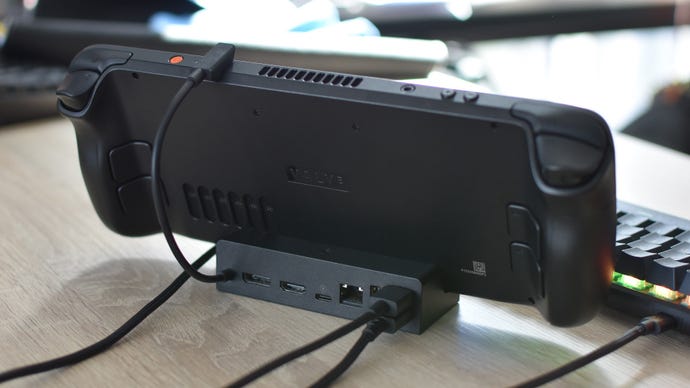
Astonishingly, it turns out that the people who make the Steam Deck know how to make a good dock for it. The Valve Steam Deck Docking Station makes a convincing argument for keeping things official, with excellent desk grip and a perfectly snug-fitting stand that matches the Deck’s own matte black plastic finish.
The real reason to buy one of these, mind, is the range of connections. Three full-size USB ports provide enough room for a wired mouse, keyboard, and thumb drive all at once, while the combination of HDMI 2.0 and DisplayPort 1.4 outputs grant multi-monitor support. That’s a pretty rare quality among Steam Deck docks in general, so it’s worth paying for Valve’s own model if you want to put your Steam Deck to work as an improvised desktop.
Speaking of paying, the Steam Deck Docking Station is undoubtedly a premium option, and if you just want something to occasionally hook up a mouse for Desktop Mode tinkering, then you can likely get away with a much cheaper alternative like the Syntech Docking Station (below). Still, it’s very nicely put together, and does offer relatively high-end connectivity. It’s also, I’ve recently noticed, had a permanent £10 / $10 price cut since release. Small mercies!
Syntech Docking Station
The best cheap Steam Deck dock

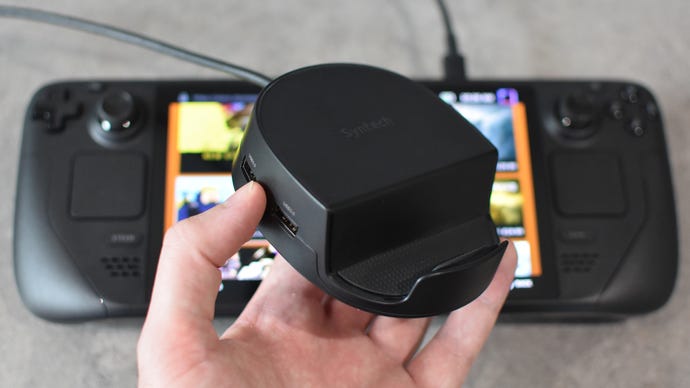
The Syntech Docking Station is both pleasantly affordable and unusually quirky, adopting a rotund shape with a semicircular strip of well-spaced ports. It’s perfect if you’ve spent most of your Steam Deck accessory budget on a fat microSD card, but still want a dock that’s not a bargain bin bore.
Connectivity-wise, Syntech’s dock almost matches Valve’s own, including the healthy supply of three USB 3.0 (AKA 3.1 Gen 1) ports/ It’s only missing a DisplayPort output, so any external monitor shenanigans will need HDMI. It also doesn’t grip the table as firmly as the official dock, but then stability isn’t really a concern, as the round base does mighty well at keeping the Steam Deck upright. Out of all the docks on this list, it’s the one I had the most trouble trying to knock over on purpose, so accidental bumps should give it even less bother.
Side benefit: it’s also compatible with rival handhelds, the Asus ROG Ally and Lenovo Legion Go, both on connectivity and on having a stand slot in which they can all fit. Worth knowing, just in case you’re not strictly monogamous with the Steam Deck.
Ugreen Docking Station for Steam Deck
The best Steam Deck dock for USB-C

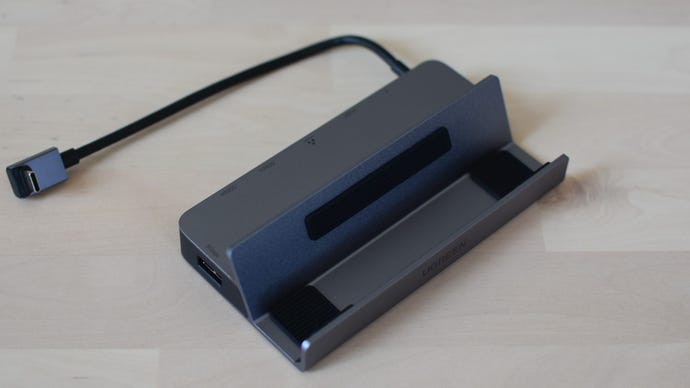
Another relatively cheap dock, the Ugreen Docking Station for Steam Deck’s secret weapon is its second USB-C port. A literally tiny detail, sure, but consider this: most Steam Deck docks only have one, and it’s going to be filled in whenever you’ve got the power cable connected for pass-through charging. Any USB-C peripherals or external SSDs, of which there are a growing number, will thus lose their home – unless you have a dock like Ugreen’s to provide a spare.
While it apparently comes at the cost of a third USB-A port, two of those are still enough for a mouse and keyboard, and there’s more to like besides. Aluminium, as the main building materia, gives it a sleek look and rigidity that even the Valve Steam Deck Docking Station doesn’t quite achieve, and like Syntech’s dock, it can accommodate non-Steam Deck handhelds as well. It’s also got more grip than the circular Syntech, even if it’s not as topple-proof when the Steam Deck takes a clumsy bump.
Steam Deck docks: setup and troubleshooting
Beyond a bit of cheeky firmware updating, Steam Deck docks don’t typically need much setup faff of their own. However, they are still mere blocks of circuitry and silicone, designed by fallible human hands, and as such may need certain encouragements from time to time. Hark, some tips…

Updating firmware
If you’re using the official Steam Deck Docking Station, you may be prompted to install Valve’s firmware updates on the Steam Deck itself. Otherwise, you can make sure your dock has its firmware up-to-date by following these steps:
- Connect the dock to your Steam Deck, with the power supply (that’s just your Deck’s own USB-C power cable) plugged into the dock.
- Restart your Steam Deck.
- Unplug both the dock from the Steam Deck, and the power cable from the dock.
- Wait 10 seconds, the connect everything again.
This should kickstart a firmware update, but if it doesn’t, try unplugging the power cable (while leaving the dock and the Deck connected).
Setting up displays
Besides the obvious stuff – making sure your monitor or TV has the correct input selected, for example – using your Steam Deck with an external display comes with some quirks.
- When connected with the Deck in Gaming Mode, its own screen will go black. That’s nothing to worry about, but if you want to keep the Steam Deck’s screen on, you’ll need to switch to Desktop Mode.
- The Steam Deck does not officially support passive cable adapters. They might work, but you’re more likely to see problems. Stick to active adapters (or just use the right cable) for the most reliable results.
- Likewise, try to make sure your cables meet the spec of your dock’s outputs. I once tried an HDMI 1.4 cable with the official dock’s HDMI 2.0 port, and it didn’t work – but after digging out a newer, HDMI 2.0-compliant cable, all was well.
- If the outputted video doesn’t fill your external display, you can attempt a fix using the Steam Deck itself. While in the default Gaming Mode, open the Steam menu, navigate to the Display menu, then disable “Automatically Scale User Interface.” Finally, adjust the slider until the image fits the screen.
Audio setup
While Steam Deck docks lack dedicated sound outputs – audio is purely carried over the HDMI or DisplayPort connections – you can enable 5.1 and 7.1 surround sound while docked. With your external display already connected and working, reboot your Steam Deck into Desktop Mode, and click on the speaker icon in the taskbar. Then, find the HDMI/DisplayPort slider, click on the three-line icon, and select the number of channels that your speakers support.